Well, I was supposed to write this post last night, but instead found myself passed out on the couch nearly as soon as I sat down – chasing a toddler all day while pregnant sure is tiring! But anyway, I’m sneaking in a little time this morning while he’s happily learning letters with Elmo.
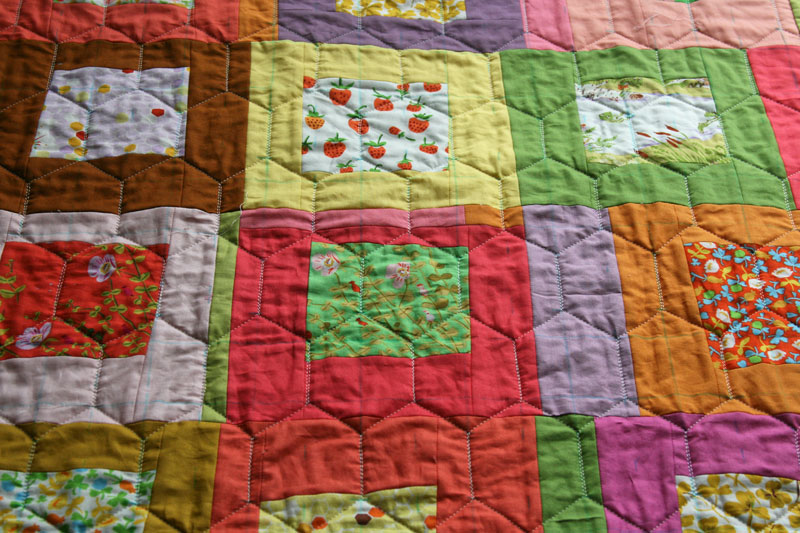
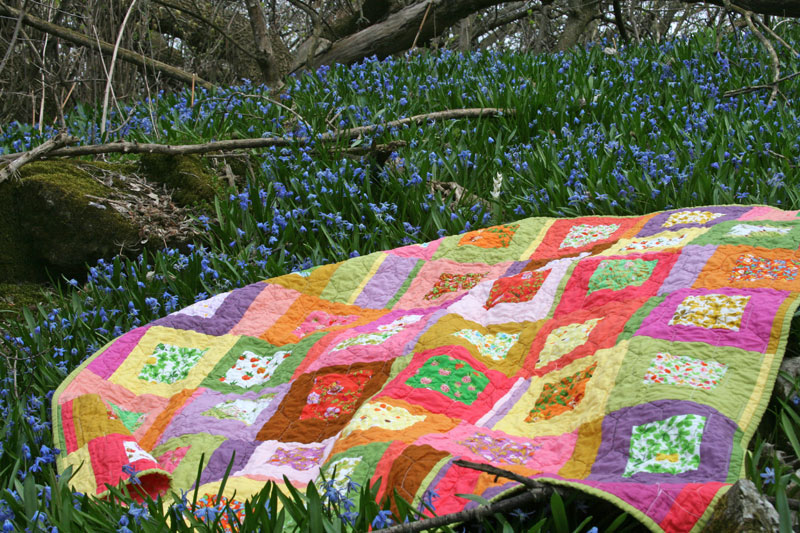
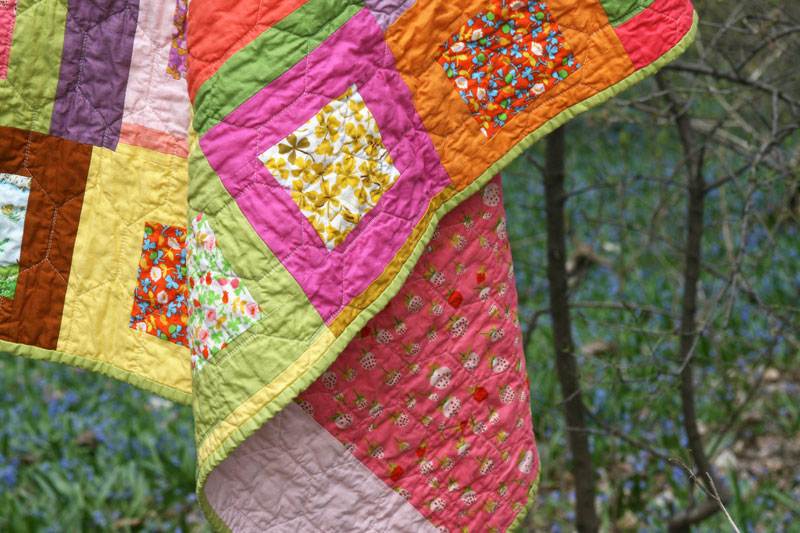
Thanks for all your comments on my Briar Rose quilt! And now here’s a quick little tutorial showing how I did the honeycomb quilting… As I mentioned before, it’s a straight line quilting design, which I did with my walking foot. There is a lot of starting, stopping and pivoting, so you might want to try this design on a smaller quilt before committing to a large one. This quilt measured about 50″ square, and I found this to be manageable and not too terribly tedious!
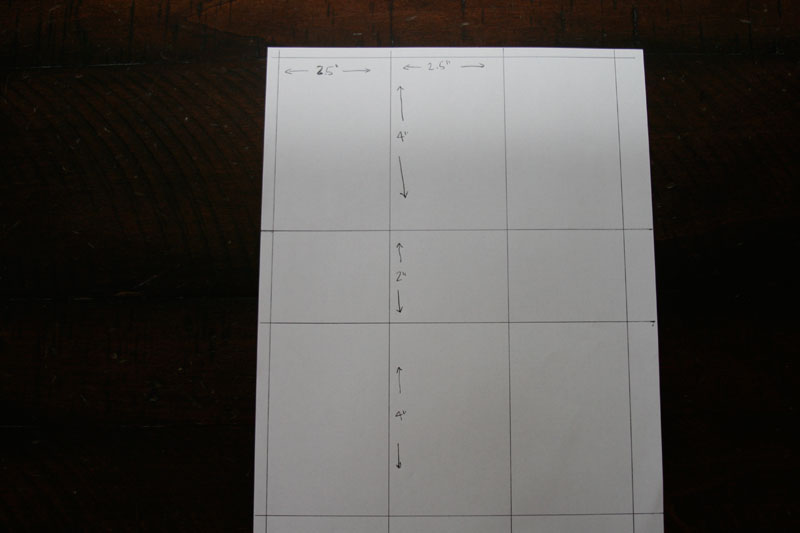
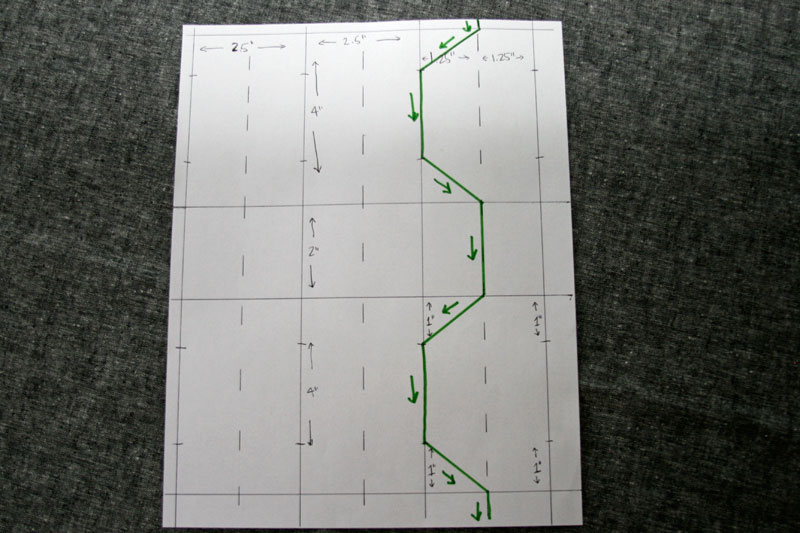
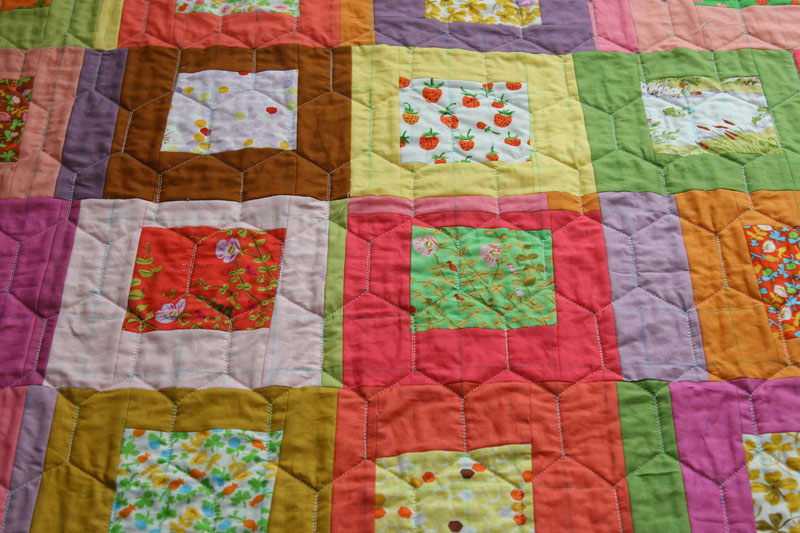
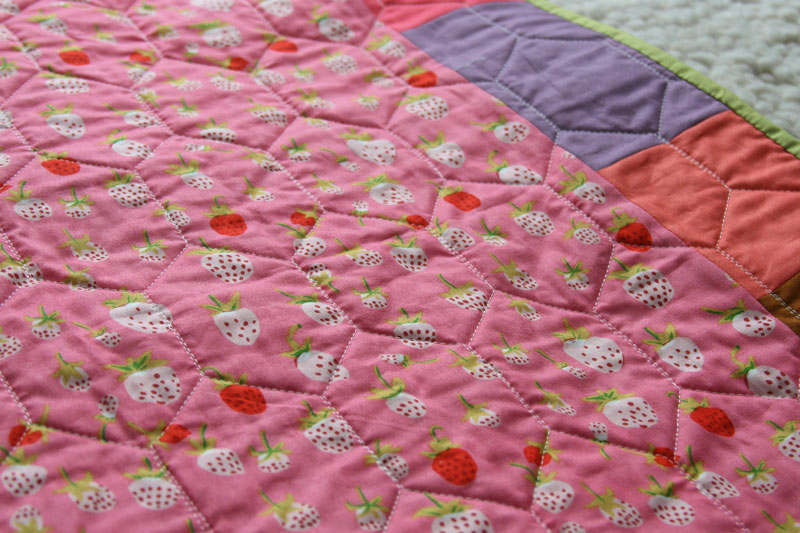
The key for me in keeping it all straight and in line was to first draw out a grid on my quilt top with a washable marker (I use the blue Mark B Gone washable markers which I buy at JoAnns). This size grid creates elongated hexagons which measure 4″ tall at the tallest point and 2.5″ wide.
Start by drawing vertical lines 2.5″ apart across the quilt top. Then you’ll want to draw horizontal lines which alternate between 4″ and 2″, as shown above.
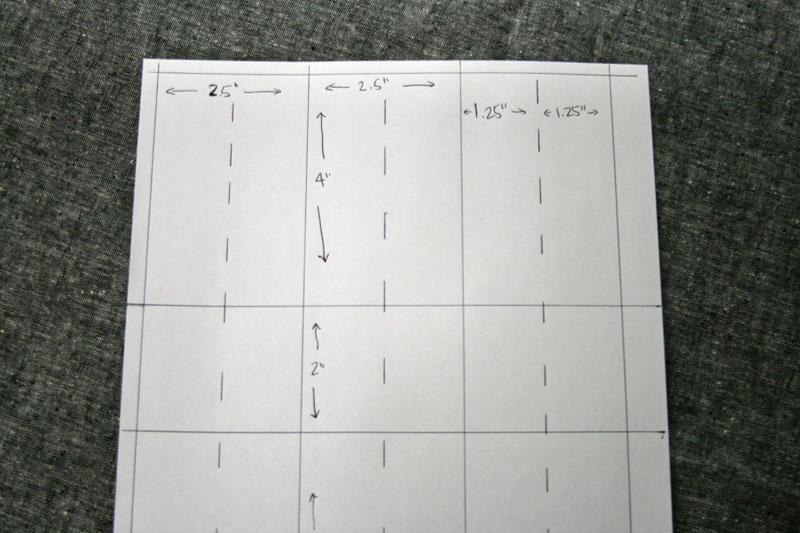
Next draw dashed vertical lines halfway between the vertical lines you already drew (1.25″ away from your vertical lines).
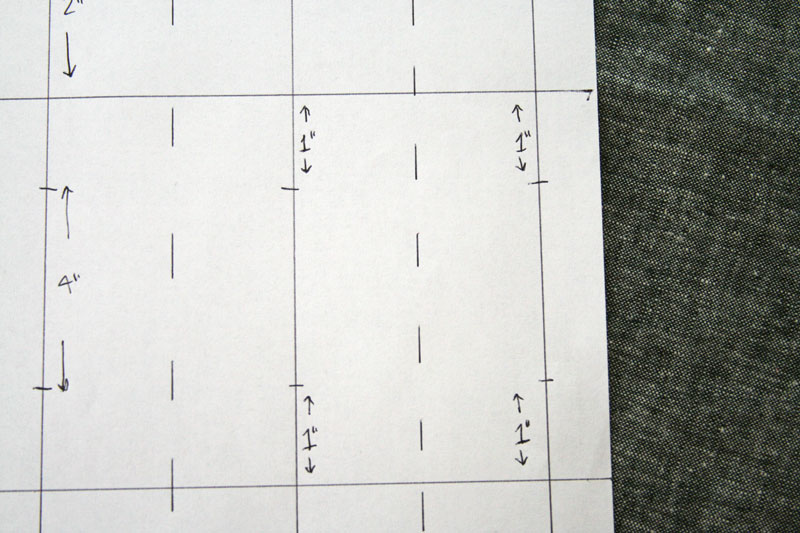
Then make a small tick mark 1″ away from each horizontal line (your mark should be drawn on your solid vertical lines – you won’t need them on the dashed lines). And that’s it for marking (phew!). Now onto the actual quilting!
The quilting is done in columns, starting at the top and finishing at the bottom of your quilt with one continuous line. You’ll create half hexagons for each column you quilt. I like to start in the middle of the quilt and quilt all the columns out to the right side of the quilt, then I flip the quilt and start from the middle again, working out to the side.
Starting on the dashed vertical line, sew until you reach the first horizontal line, then keeping your needle down, pivot and sew diagonally out to the first tick mark. Pivot again and sew along the solid vertical line to the next tick mark. Pivot and sew diagonally back to reach the point where the dashed line crosses the next horizontal line, then pivot and sew along the dashed vertical line until you reach the next horizontal line (and repeat!)
[Note: I sewed the straight lines by eye, but you could certainly opt to draw all the lines out ahead of time if you’re worried about keeping your lines straight. ]
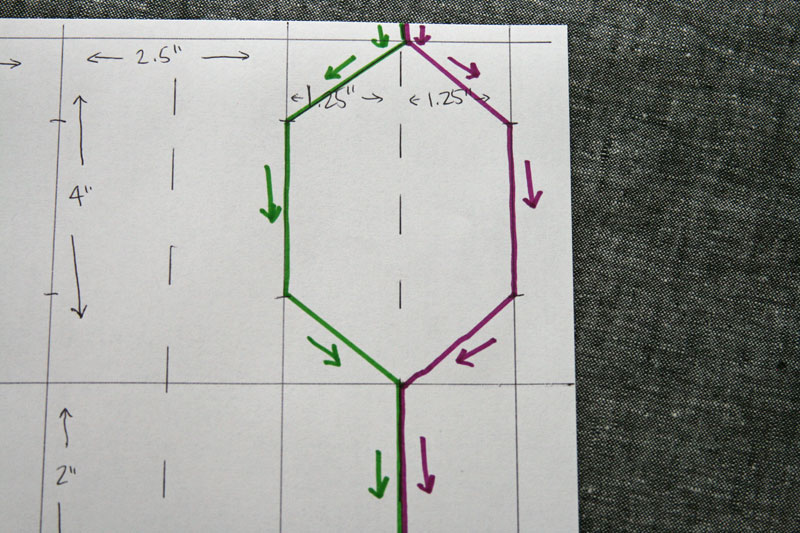
Once you complete the first column, you’ll repeat this process to make the other half of the hexagons (as shown above in purple). The quilting will start in the same place, and you can decide if you want to sew on top of the line you previously made, or if you want to sew alongside that line. (I opted to try to sew very close to the existing line).
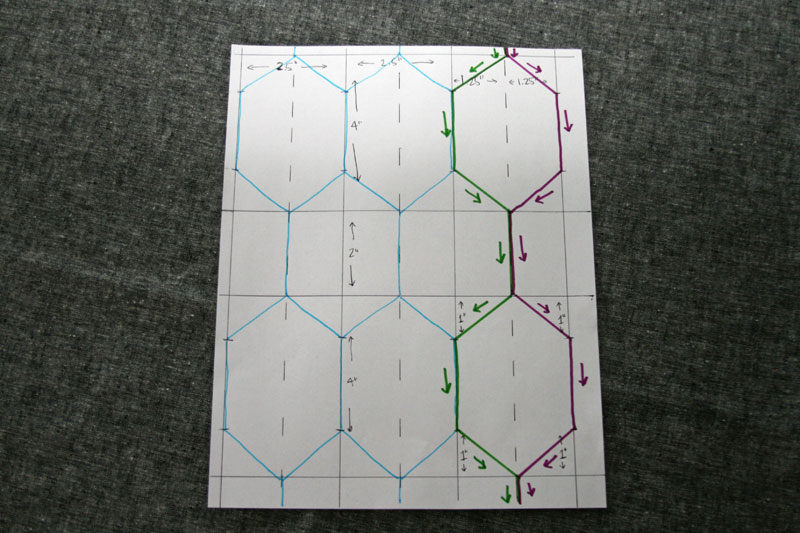
Continue quilting and soon you’ll see a great pattern of elongated hexagons emerge!
Any questions? Leave them in the comments and I’ll answer there. And of course, I’d love to see it if you decide to try this quilting design, so be sure to add them to my Flickr group!

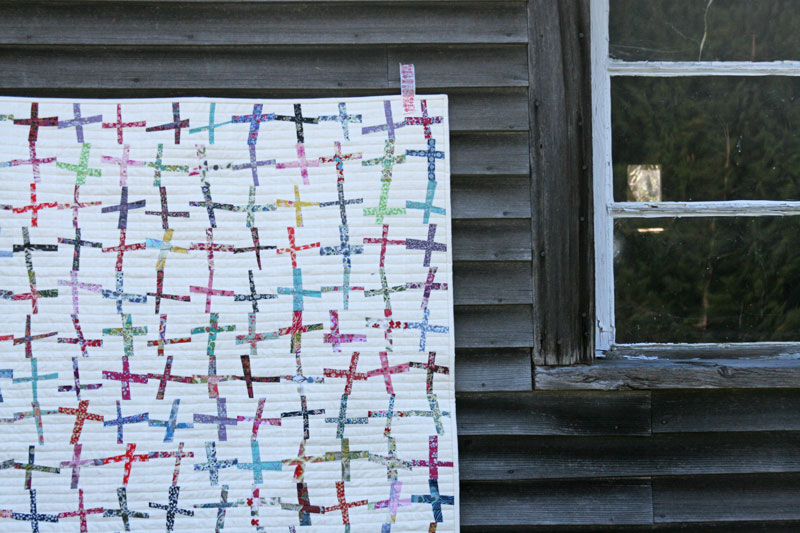
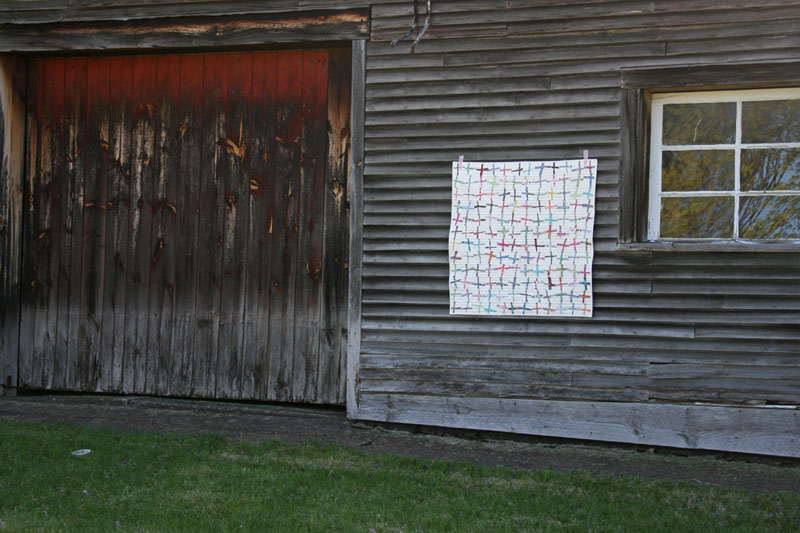


 Greater than/less than
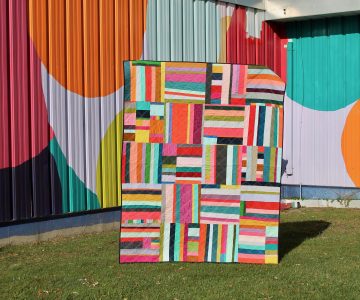 scrappy solids