Because if it’s not a patchwork square quilt, it’ll probably be a strip quilt!

I know, I know… try something new already! That’s pretty much what I say to myself too, but then I find myself once again making another strip quilt. Because if I’m perfectly honest, I really love them. I’m pretty sure that I could make a patchwork quilt and a strip quilt out of all my favorite fabrics lines and continue to be quite happy.

I originally planned on making a second patchwork quilt out of the remaining Far Far Away 2 fabrics I had left over, but at the very last second decided to go for strip quilt instead. I’m happy I did, because I think the strip quilt works well with these designs — you get to see a little more of Heather‘s fabulous designs this way.

I added in some Kona Snow and some Essex linen blend (in putty, I think?). The back got a couple extra strips of the prints along with some more of the Essex linen. I really love the texture and extra weight of the linen/cotton blends. And to add to the predictability, I used my favorite lime green binding. Of course.

I’m not sure where this one will end up… I’m kind of tempted to keep it, but we’ll see! I do know that I’ll first spend some time fixing a little error I just noticed. (photos always show you the errors that aren’t blatantly obvious when you’re just looking at the quilt in person, don’t they?) Well, I just noticed in these photos that one side is clearly not straight, even though I remember making sure it was square… (hmmm…), so I think I’ll spend a little time ripping out that section of binding so I can trim that little bulge down. Good fun.


 Greater than/less than
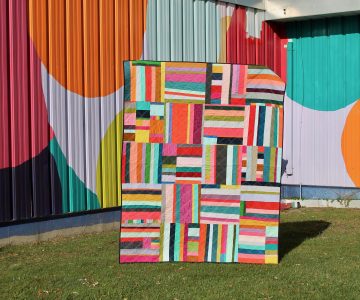 scrappy solids