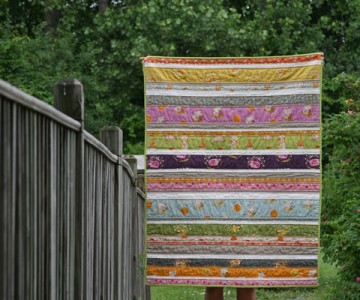
So… remember this quilt? It’s still not finished, but I’ve had a number of requests for a tutorial, so I decided to put a quick one together for you today.
You might recall that I originally made my Flying Farfalle quilt using this technique, which was inspired by an image in Gwen Marston’s Liberated Quiltmaking II book. For my second quilt, I decided to change it up just a little bit, adding in a thin little strip of white to offset the bright colored points from the coal background.
I’m calling it Dinner Date because the coal background reminds me of a men’s suit with the pops of color as a fun tie.
So, to start, collect your materials…

For this quilt, I’m using Kona Coal as the background. I’ve decided to go with 6.5″ squares for this one, but you should feel free to switch it up as you’d like – rectangles, larger squares… whatever works for you! Along with your background fabric, you’ll need fabric for the points – I’m using up some of my colored solid scraps. The size doesn’t really matter, though I think it works best if you use a longer strip that’s at least 2″ wide. If you decide to include the thin white strip, you’ll also need some white fabric. My white fabric is 1″ wide.

Sew the 1″ wide white strip to the long side of your solid strip (1/4″ seams) and press. (I press my seams open, but feel free to do whatever works best for you).

I wanted my white strip to finish at 3/8″, so after sewing the white strip to the colored solid, I trimmed it back to 5/8″.

In order to sew the colored points to your solid background square, flip the colored strip over and position it along one of the corners, as shown in the photo above. (You will end up flipping the colored section back over that gray triangle after sewing your seam, so just make sure that the colored portion will adequately cover the background triangle.) I like my triangle points to be wonky, so I vary the angles when sewing the colored portion to the background fabric.
Sew along the edge of the white strip.

Repeat for the opposite corner, using another of your colored strips. Iron the points and you’ll have something that looks a little like the photo above.

And the back will look a little like this.

Using your background square as a guide, trim off the excess fabric along all sides of the square.

Since your colored fabric has now become the points of the square, you can trim off the excess background fabric that’s under the colored point. Just trim along the edge of the white fabric.

And voila! A finished block! Make several more and you can start to see the fun pattern when you put them together!

As always, let me know if there are any questions, and if you make a quilt like this one, be sure to add it to the FITF Flickr group!
 on the design wall…
 I’m nothing if not predictable (another FFA2 quilt)


Pingback: Thank You and An Opinion Please… « I Will Make Crafts
Pingback: Les 100 meilleurs tutos de 2010 | Couture Stuff
Pingback: Free Triangles: Claire’s Quilt | made by marika