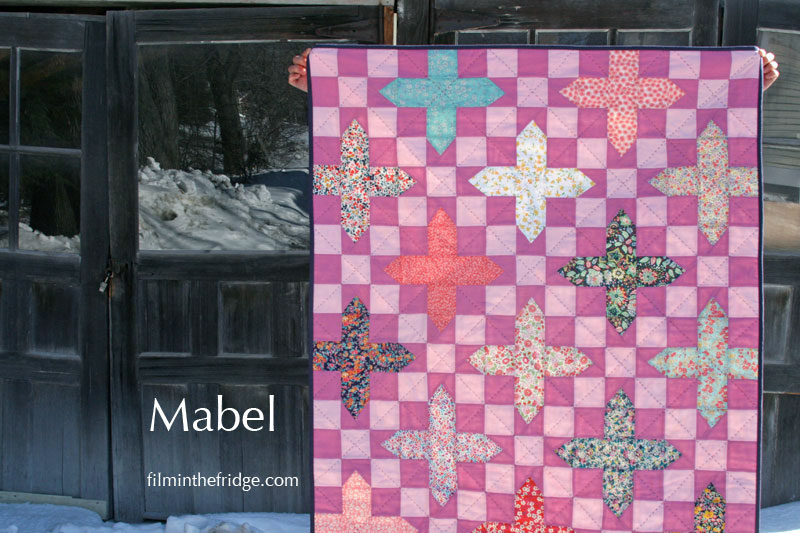
Happy Monday! Today I’m pleased to show you this baby quilt made out of lovely Liberty of London fabrics as my stop on the Westwood Acres Liberty of London blog hop.
Westwood Acres offers a fun Liberty of London monthly club, where you receive a selection of 10 Liberty prints each month. Maybe you’re already a member and have some prints waiting to be put to use? Or perhaps you’ve been thinking about signing up for the club? This fun blog hop will hopefully give you some ideas of what you might make to show off your beautiful Liberty prints.
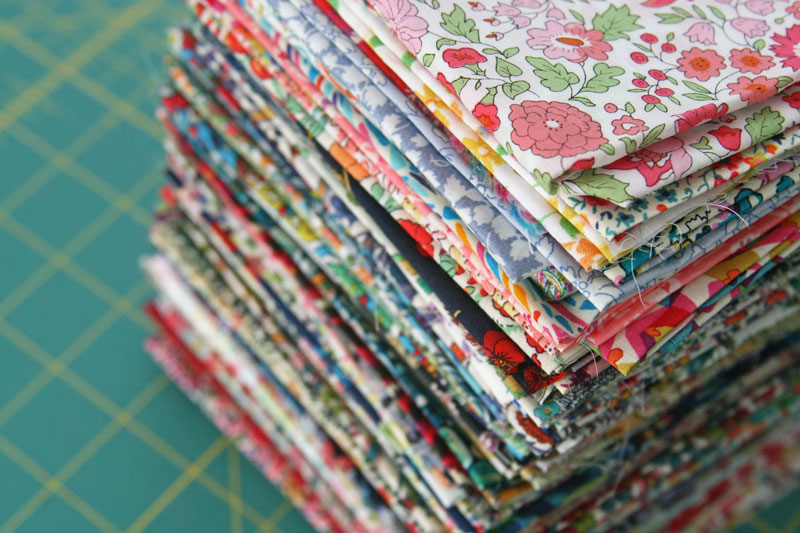
I’ve been enrolled in their Liberty club for about a year now, so I’ve amassed a fair number of pretty prints, and I’m afraid I’m as guilty as many who just admire their Liberty stashes rather than sew with them!

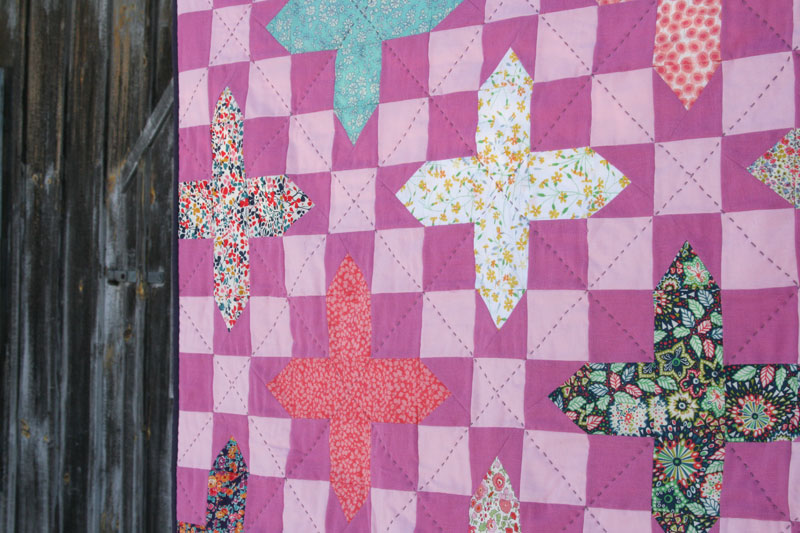
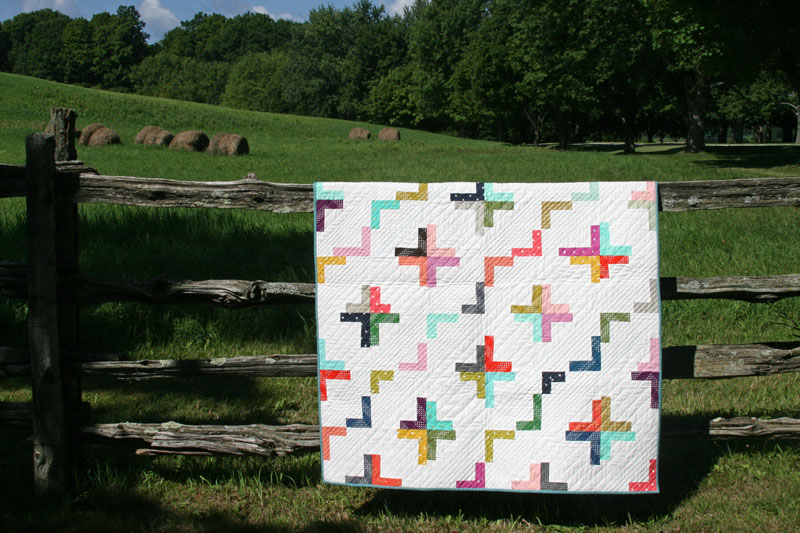
After a lot of thought (and one royally bad quilt top which I’ve opted not to photograph at this time – it’s such a bummer when that happens!), I found my way back to a favorite – the simple plus. I love how it shows off the fabric, and I find it especially nice with small/medium scale prints.

To change it up a bit I decided to give the plusses some pointy ends and separated the plusses with a fun checkerboard design.
I love how Liberty pairs with double gauze (this quilt out of Liberty & Nani Iro is a favorite in our house), so I’ve used this great solid plum double gauze from the Cotton & Steel Bespoke collection.
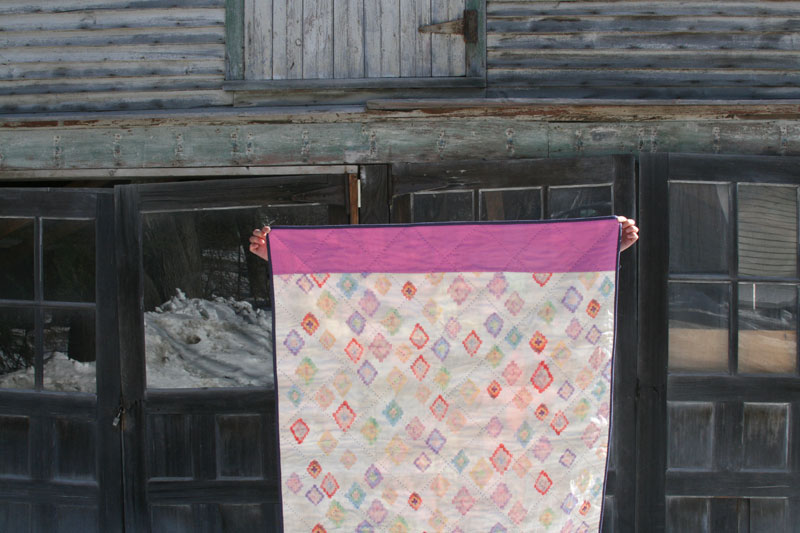
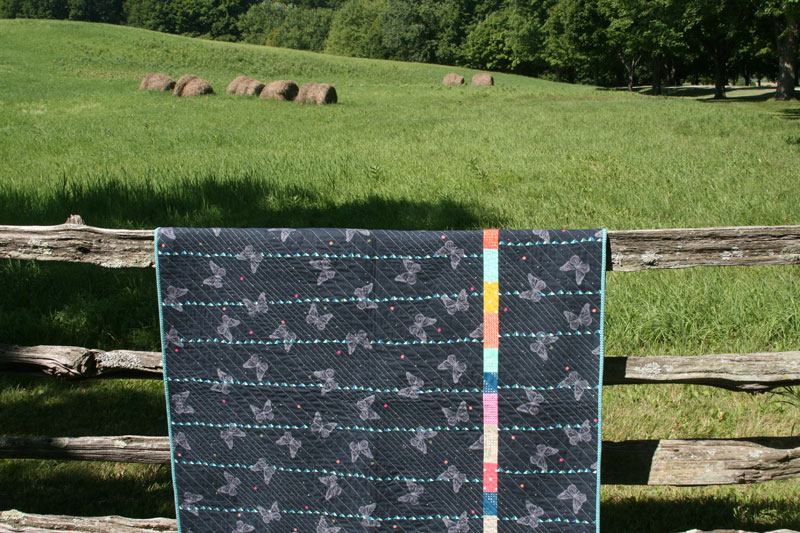
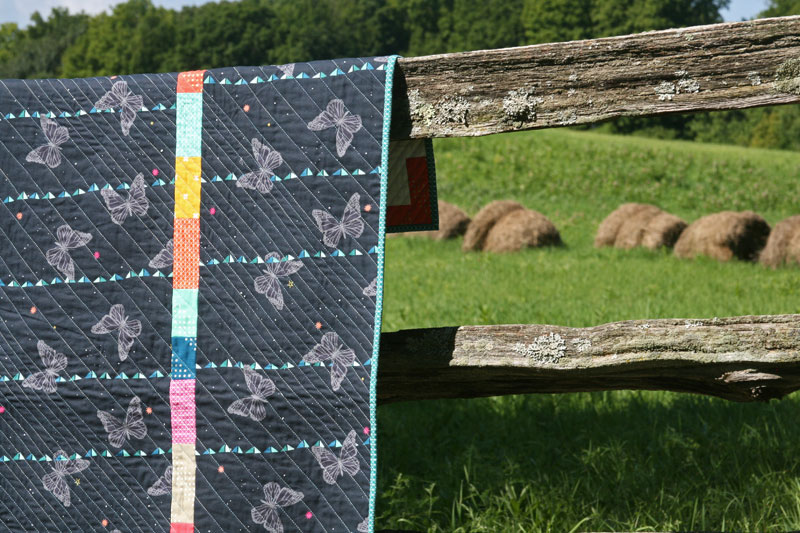
To add to the softness, I’ve used some extra double gauze on the backing – a great Nani Iro print that paired so well along with a bit of the plum to get it up to size.
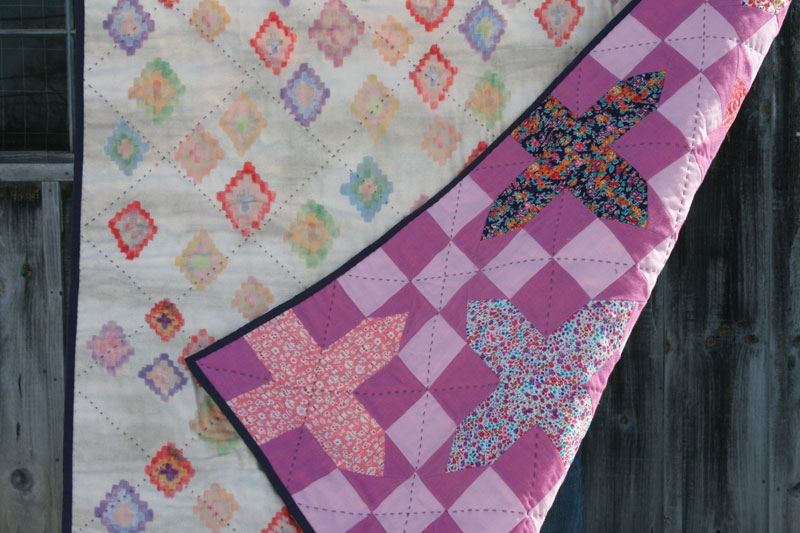
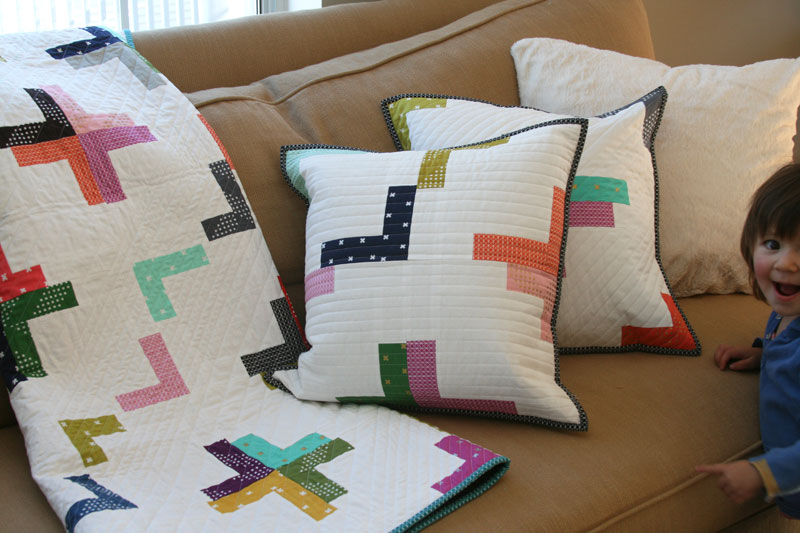
Despite needing to get this quilt done quickly for this post, I couldn’t not hand quilt this one! The Liberty, double gauze and super low loft Quilters Dream Request and hand quilting makes for a wonderfully soft and drapey quilt – perfect for a new baby (or for anyone, really! Make additional blocks and make a larger throw for yourself!)
_ _ _
Want to make one? Keep reading for the tutorial! (Also, I tend to be kind of wordy, but it may help to read through the full tutorial before starting)
Mabel – a Liberty of London baby quilt
size: 38″ x 43″
This fun little baby quilt is a great way to showcase some favorite fabrics, beautiful Liberty of London prints in this case. It’s made up of two blocks, alternating to create this great pattern. Have fun playing around with many different background color pairings!
Note: 1/4″ seam allowance used throughout
Materials:
Solid A (the dark plum shown in the sample quilt): 1 1/4 yards
Solid B (the lighter purple solid in the sample quilt): 1/2 yard
Liberty of London prints: 15 prints (to make each plus a unique print) measuring 9″ x 9 1/2″. (This could be cut from any of the sizes offered through the club – a fat sixteenth, fat eighth, or fat quarter.)
Cutting:
From Solid A, cut 6 strips measuring 3″ x width of fabric (wof). Subcut into 14 – 3″ squares per strip (a total of 71 – 3″ squares are needed for this quilt). Cut remaining fabric into 6 – 4 1/2″ x wof strips. Subcut into 9 – 4 1/2″ squares per strip (a total of 49 – 4 1/2″ squares are needed for this quilt). Cut each of the 49 – 4 1/2″ squares in half diagonally and set aside.
From Solid B, cut 6 strips measuring 3″ x wof. Subcut into 14 – 3″ squares per strip (a total of 75 squares are needed for this quilt)
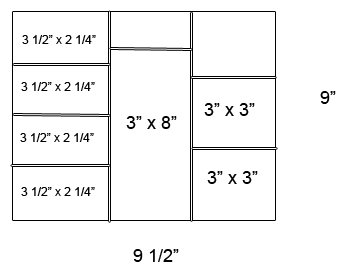
From each Liberty of London print, cut 2 – 3″ squares, 1 – 3″ x 8″ strip, and 4 – 3 1/2″ x 2 1/4″ rectangles. See cutting diagram below:
Block A – the plus block:
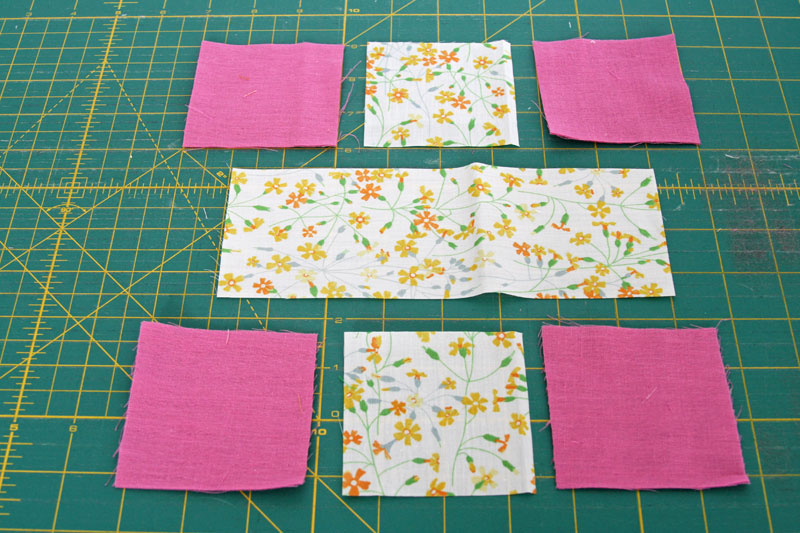
Each block uses 4 – 3″ squares of fabric A, along with 2 – 3″ squares and 1 – 3″ x 8″ strip of one Liberty print. Position the pieces as shown and sew the squares together in each of rows 1 and 3. Iron seams.
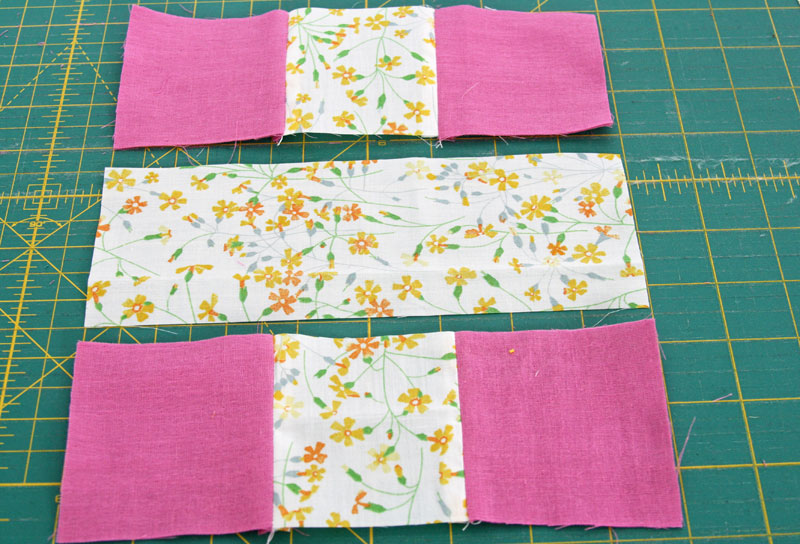
Sew rows together to create an 8″ block.

Note: I recommend assembling all the plus blocks first and positioning them on a design wall/floor. It will be important to know where the blocks will be positioned in relation to each other so that the printed triangle points in Block B match the corresponding prints in Blocks A.
Block B – pointed checkerboard block:
Assemble triangle pieces:
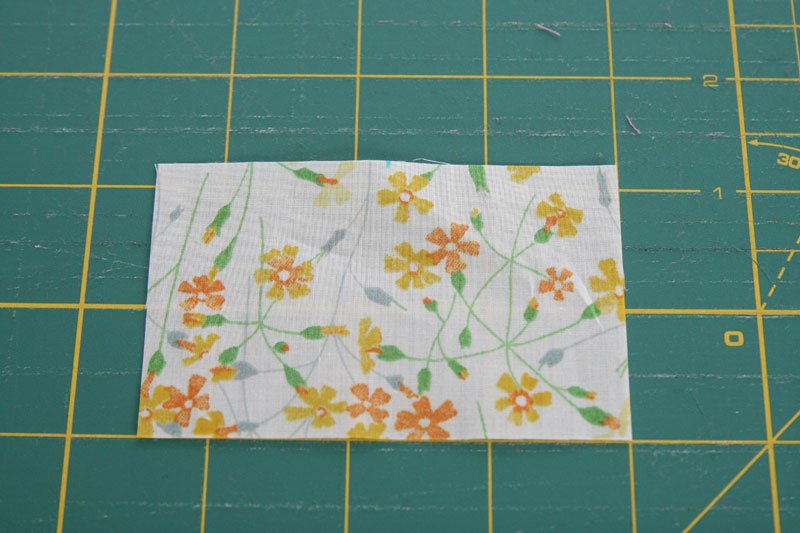
Mark the centerpoint of each 3 1/2″ x 2 1/4″ Liberty print (measure in and mark 1 3/4″ from one edge – you can barely see my blue marking at the center top of the fabric above)
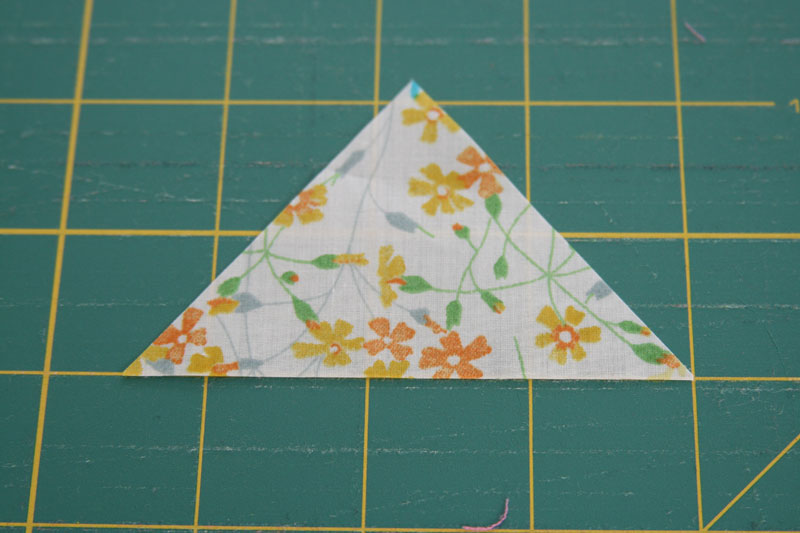
Trim each piece into a triangle shape by aligning your ruler from the top centerpoint to the bottom corner. Repeat for opposite side.

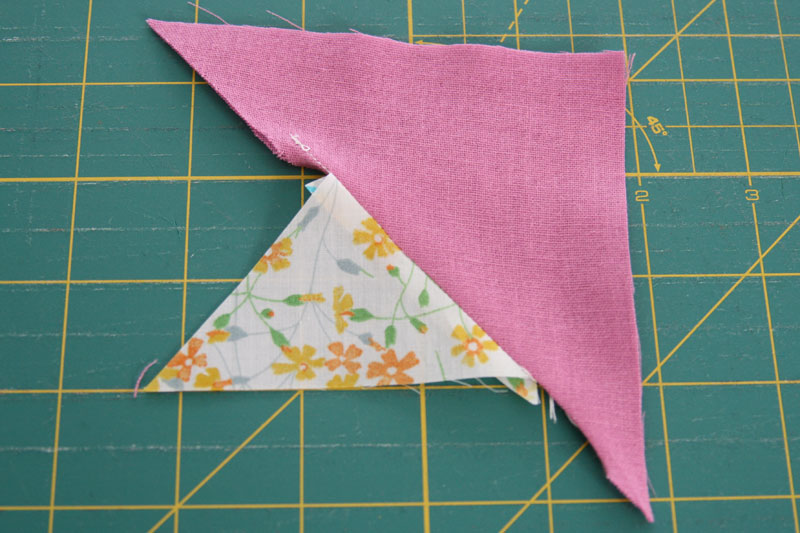
Sew one of the halves of the 4 1/2″ square (fabric A) to one diagonal side of the printed triangle. Align fabric A as shown, so that fabric A extends at least an inch past the base of the triangle.
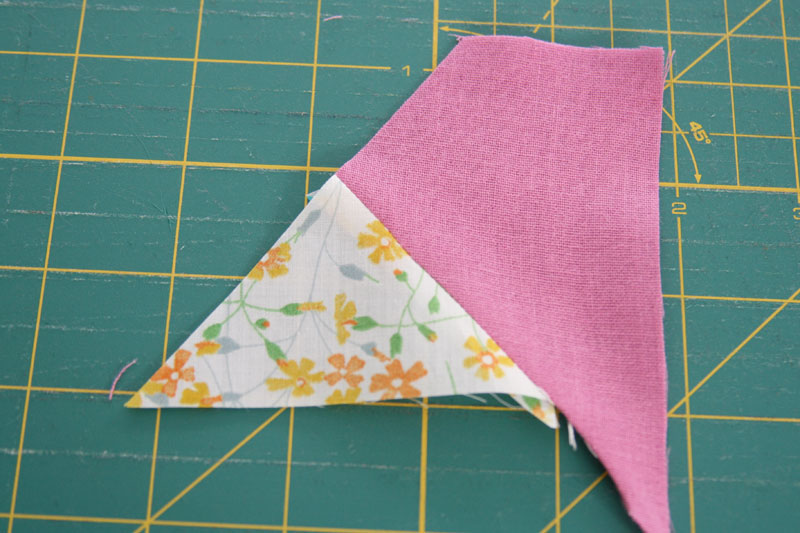
Iron and trim excess in line with the printed triangle.
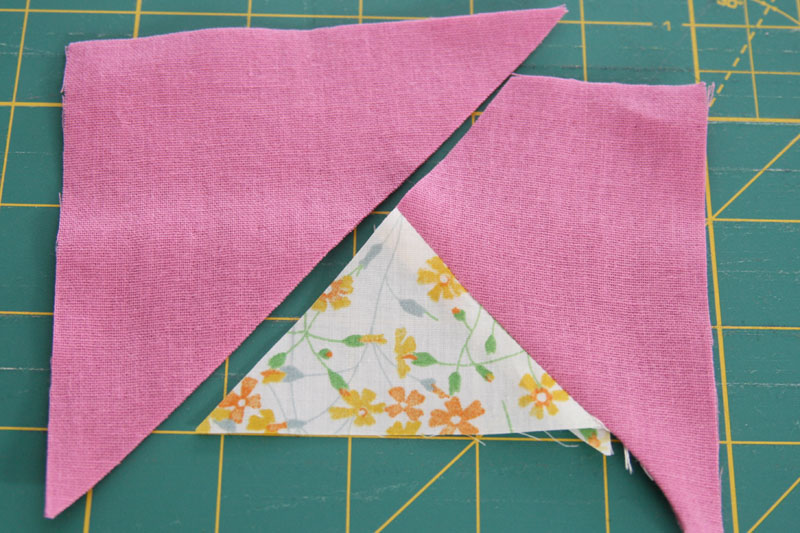
Repeat for opposite side.

Trim to 3″ square. Repeat to make the remaining triangle blocks.
Note: You’ll see that where Block B falls in the corner of the quilt or along an edge, you will only need 2 or 3 triangle blocks, and consequently you’ll find that you may need to make 2, 3 or 4 triangle blocks per print, depending on how you lay out your quilt. Deciding on layout before sewing these blocks will save you from making some you may not need!
(Note: The layout shown above is for a block with 4 points – if you are making a block that only requires 2 or 3 points, use a solid 3″ square of Fabric A in place of a triangle block).
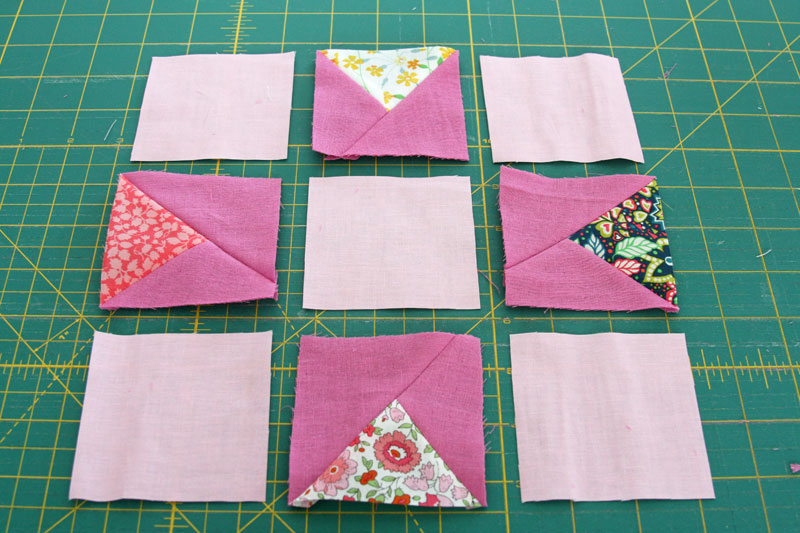
This block uses 4 – 3″ triangle blocks alternating with 5 – 3″ squares of Fabric B, as shown above.
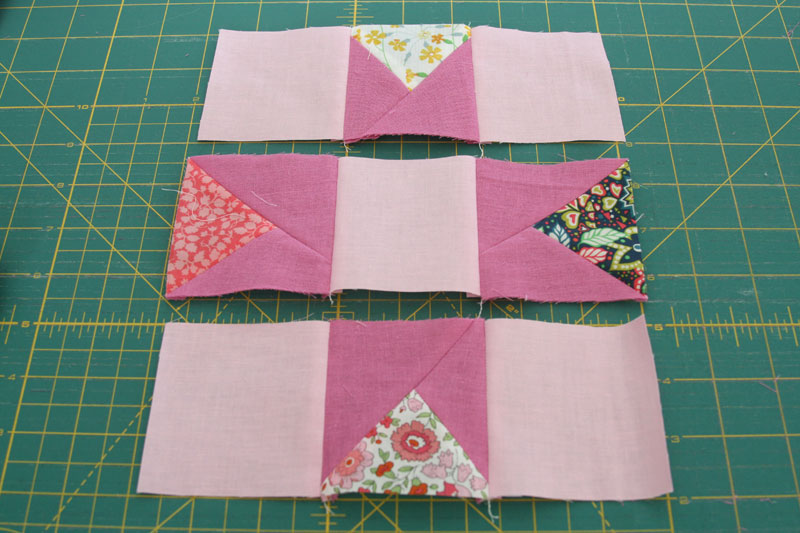
Sew squares together in rows and iron seams
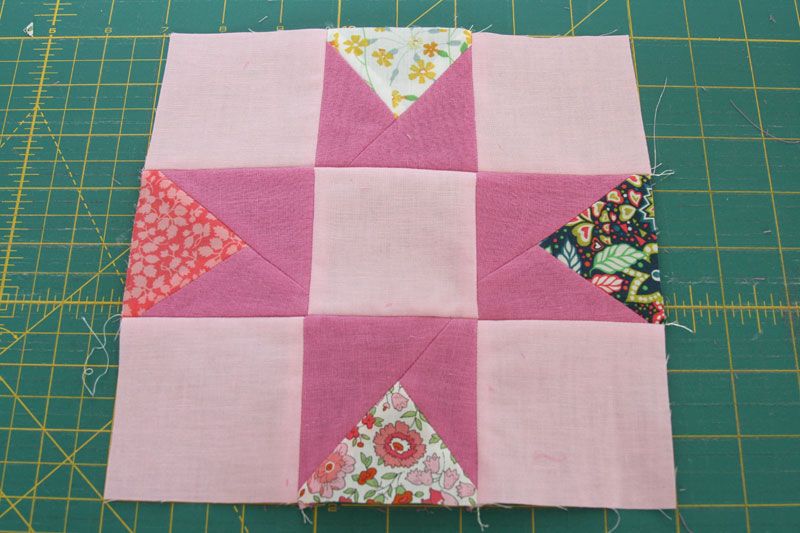
Sew rows together to make an 8″ block
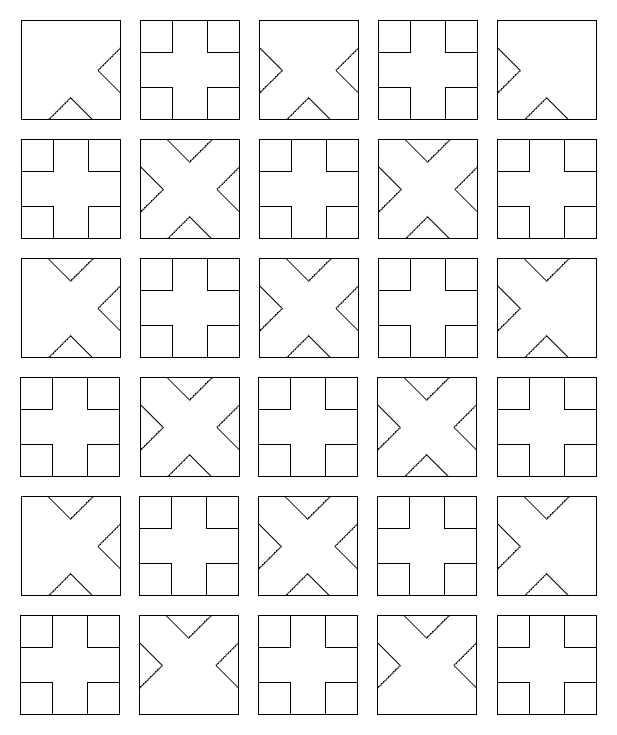
Alternate Blocks A and B according to your layout and sew together blocks in each row. Iron seams. Sew rows together to complete your quilt top.
Be sure to check out the other stops on the blog hop for more Liberty inspiration!
February 24th: Kick Off! <a href=”http://www.acraftyfox.
February 25th: <a href=”http://
February 26th: <a href=”http://sotakhandmade.
February 26th: <a href=”http://www.
February 27th: <a href=”http://quarterinchmark.
March 1st: <a href=”http://www.
March 2nd: <a href=”http://filminthefridge.
March 3rd: <a href=”http://www.
March 4th: <a href=”http://blueisbleu.
March 5th: <a href=”http://www.acraftyfox.

_ _ _
A selection of Liberty prints was sent to me by Amanda for this project (though unfortunately these were wasted in that aforementioned unfortunate quilt!). I would have participated regardless – I think my love of Liberty is well known!


 Greater than/less than
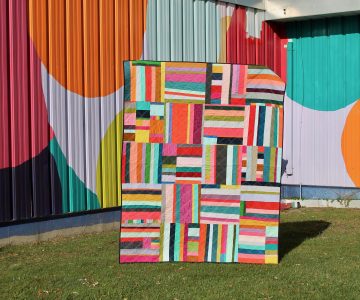 scrappy solids