I’m often asked how I baste my quilts. To be honest, it wasn’t something I even considered when I first decided I wanted to make a quilt. Before even purchasing fabrics though, the women at one of my local quilt shops started extolling the benefits of spray adhesive. So when I got to that part of the quilting process, I headed back to the shop for a can of 505, their favorite spray adhesive. (All this to say that I really have no experience basting with safety pins, so this doesn’t mean that one method is better than the other – this is simply my experience with spray adhesive).

Anyway, here’s a can of the 505 – it comes in two sizes, but I much prefer the larger size. I buy mine locally, though I’m sure you could find it online as well. I like how well it sticks, and I’ve never had a problem with it gunking up my sewing machine. (I’ve only used this brand, so I can’t comment on how other brands of spray adhesive work.)

My only concern with the good old 505 spray is in what you’re breathing in. I’m quite certain that it’s not good for you, since the recommendation on the can is to make sure you use it outdoors or in a well ventilated space. Being that I’m in Vermont, that’s not really possible most of the time, so I wear this heavy duty mask. Cute, right? (of course, since getting pregnant, the job of spray basting has fallen to Morgan, which I don’t mind at all!)

So, to start… I spray my quilts on the floor in our guest bedroom. I don’t particularly care about the carpet, so I lay out the batting directly on the carpet and I don’t worry about any overspray (though I’ve never noticed the surrounding carpet to ever be sticky). If you’re doing this on nice flooring, you may want to first lay out an old sheet. Lay out a piece of batting that’s slightly larger than your quilt top, smoothing out any wrinkles. (doing this directly on the carpet works well for me, since the batting tends to stick to the carpet and remains nice and taut).

Lay out your quilt top on the batting. At this point I trim the batting if it’s significantly larger than the quilt top. I like to leave an extra 1-2 inches of batting all around the quilt top.

- Pull back about half of your quilt top.
- Spray the 505 spray directly on the batting, starting at that midway point (a little goes a long way!). I like to spray a section about a foot in width at a time.
- Smooth your quilt top back over that section of batting that you just sprayed. I start from the middle, working my way out, making sure I’m pulling it taut (but not tight – you don’t want to distort the quilt top).
- Repeat this process until you reach the top of the quilt. Then repeat for the other half of the quilt, pulling back the other half of the quilt top until you reach the sprayed section.

At this point, if you have a backing that’s just one piece, you can go ahead and flip the batting and quilt top over and lay out your backing on the batting. Repeat the spray process to adhere your backing to the batting, completing your quilt sandwich.
However, I often have a pieced backing, and therefore need to make sure it lines up correctly with the front. Morgan came up with this method, and I think it works really well. On the front side, he clips the batting so he knows where the outer edges are located. This way when you flip your batting over, you can easily see where your quilt top is positioned.
Flip the batting and attached quilt top over, and lay out your batting, lining up any pieced sections with your clip marks.

The backing for this particular quilt has a pieced section along the bottom edge, so you can see that he also clipped the batting to show where the seam line was. This is where the pieced section of the backing will line up.

Once again, fold back half the quilt backing and spray in sections, starting in the middle and moving to the top. Repeat for the other half of the quilt. And now you’re ready to quilt your quilt! (I’ve found that this spray adhesive remains sticky for quite a while, so no worries if you don’t immediately get to the quilting stage. The spray adhesive then washes away with your first wash.)
I hope this helps! Feel free to leave any questions in the comments and I’ll reply there.


 Greater than/less than
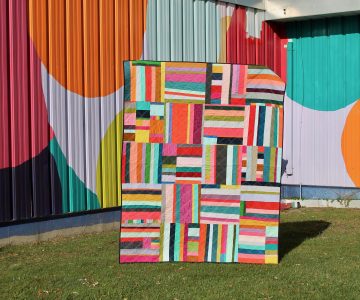 scrappy solids