
I’m so happy you liked my latest quilt, Converging Corners! And now, as promised, here’s a brief little how-to for those of you who may want to create something similar. (Please note that this is less of a specific tutorial, and more of just the method used to make these blocks… apologies to those who like very specific measurements!)
This block is constructed like a courthouse step (or a log cabin) block, but it’s the placement of the printed fabrics in two opposing corners that creates this fun design when the blocks are put together. I created 12 1/2″ blocks, but you really could easily go larger or smaller, depending on the look you’re after!

To start I selected a feature fabric for the center of the block. I used a variety of sizes for the center squares, ranging from 2 1/2″ to about 5 1/2″ square. As you can see, I started with a 4 1/2″ square for this block. Next you’ll surround this center square with your background fabric. You’ll want to aim to end up with a block that measures about 8″-9 1/2″ square once you surround the center fabric with the background fabric. I added a 2 1/2″ wide strip of white around the center block, adding one piece each to two opposing sides. (The width of the strip you need will vary based on the size of your center block)

(oh look, now there are two! I often make a couple blocks simultaneously to save time, so I figured I’d show you both blocks going forward)
Press, trim off the excess white fabric and add strips of white to the remaining two sides.

Press and then square up your block so it measures somewhere in the neighborhood of 8″ to 9 1/2″ square. Again, this doesn’t need to be precise. I think that the variations in the blocks add extra interest!

Next you’ll start adding the strips that will give you your fun colored corners. I cut strips of the printed fabrics that were anywhere from 3/4″ – 2″ wide and then sewed a white strip of the matching width to each end of the printed strips (no photos of this step, but you can see what it looks like in the photo below). I liked to have all my strips ready to go with white sewn to the ends, but alternatively you could wait until you’re ready to add that strip and then sew the printed fabric to the background fabric.

For the first ring, your printed fabrics will be short, approximately 2 1/2″-3″ long, with the remainder of the strip made up of the background fabric. Sew the two opposing strips, making sure your printed sections are at diagonal corners. (Tip: if your center fabrics are not directional, it won’t matter which corners you put the printed fabrics in, but if you are using directional fabrics you’ll want to make sure you add the printed fabrics to the upper left/lower right corners on half the blocks and to the upper right/lower left corners on the other half the blocks)

Press, trim off any excess, and then repeat for the other two sides of the block. Most often I used the same printed fabric to make up the corner, but it’s also fun to switch it up a bit, pairing it with a similar color, as in the block above, or even with a totally different print.

Repeat this process for the next ring. Your printed section should be a bit longer than on your first rung. Continue adding rings until your block measures at least 12 1/2″. (I aimed for 2 to 3 printed fabrics in each corner, though occasionally I needed 4 printed fabrics to get my block up to size). Trim each block to 12 1/2″ square.

And then the fun part! Put all your blocks together and enjoy the fun design that emerges when those corners converge!

Happy sewing! (and as always, if anything’s unclear, leave a comment and I’ll try to clarify)
Be sure to use #FITFquilts on Instagram so I can see your creations!
_
_
Like this tutorial and want to make a donation? [paypal-donation]
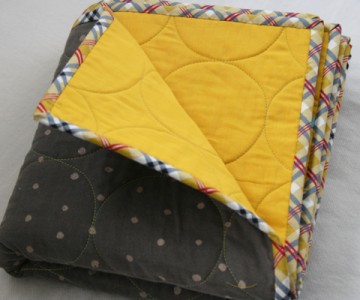 a whole cloth baby quilt


Pingback: FITF: converging corners quilt top | Film in the Fridge
Pingback: FITF: Brrr! converging corners quilt (and a giveaway!) | Film in the Fridge
Pingback: FITF: a giveaway winner and a perfect new pillow! | Film in the Fridge
Pingback: Summerlove Converges | From Marta with Love
Pingback: Clover & Violet :: Converging Corners Block
Pingback: Handmade with Love Tutorial Contest 2012 – Cast Your Vote! | Pink Chalk Studio
Pingback: February Simply Solids bee block complete! « Bending Pins
Pingback: WIP – January 2013 « Jaclyn Quilts
Pingback: My first bee block | Apple Pie Patchwork
Pingback: Twenty minutes a day | Mad About Patchwork
Pingback: Twenty minutes a day « Mad About Patchwork
Pingback: WIP Progress–January 2013 « Jaclyn Quilts
Pingback: On The Go Quilting » Friday Finds
Pingback: ScrapBeeLicious: Queen | Wasn't Quilt in a Day
Pingback: Forays into quilting | chlojomama
Pingback: The Closet Quilter · Potential Bee Blocks + New Shop
Pingback: Coming Out of Hibernation |
Pingback: Sewing Together | making good choices
Pingback: Block Challenge and Lottery – Converging Corners | Vancouver Modern Quilt Guild
Pingback: Stash Stack #8 | A Thousand Needles
Pingback: Victoria’s Quilt | Thread Dance
Pingback: FITF: Maze & Vale Converging Corners | Film in the Fridge
Pingback: Working to a deadline…
Pingback: Working to a deadline… | iamacraftykat
Pingback: The Closet Quilter · Keep ‘Em Coming
Pingback: My love travels - from Marta with Love
Pingback: Madrona Corners – Finally! | The Littlest Thistle
Pingback: Quiltcon Charity Quilt block | Vancouver Modern Quilt Guild
Pingback: Stash Bee – May Queen – Wildflower Child Creates
Pingback: Här är länkar till många moderna block | Kviltföreningen Rikstäcket
Pingback: On my design wall – 2014.05.07 - On My Block