
Be sure to check back tomorrow – I’ll be participating in the Sew Mama Sew Giveaway Day!
(Now I just have to figure out what to give away!)
until tomorrow…
Be sure to check back tomorrow – I’ll be participating in the Sew Mama Sew Giveaway Day!
(Now I just have to figure out what to give away!)
until tomorrow…
I try not to start decorating for Christmas until after Thanksgiving has passed, so we waited until Saturday to buy a wreath for our front door. Now that the turkey’s been carved and leftovers eaten, I feel like it’s ok for me to put the Christmas mix back on the ipod and let it get a little play time and to start with a little decorating.
We don’t have our tree yet, but I started this little project which will be used to decorate the tree. I’ve always loved paper chains, and decided to upgrade it a bit this year, using my favorite fabrics.

For this project, you’ll need a selection of fabric, and some heavy fusible interfacing. (Velcro and/or snaps would be needed if you decide to go for the optional fastening method).
To start I selected a number of fabrics – some of my larger scraps, as well as a few favorite fabrics. I used a variety of colors, but this could be made using red, green and white fabrics, or fabrics of a particular hue, or anything that fits the look you’re going for.
I cut each piece to 3″ x 9.5″. You could vary these measurements depending on how wide you want your chains to be. (I wouldn’t recommend going smaller than a width of 2.5″ or you may find it too difficult to turn the fabric right side out.)

At the same time, I cut a piece of heavy fusible interfacing. You’ll want the interfacing to be about 1/2 an inch smaller in width and about an inch shorter in length than the size of the fabric once it’s sewn into its final shape. I cut mine to about 1″ x 8.5″. You’ll need one strip of interfacing for each fabric strip you cut.

Take your fabric piece and fold it lengthwise, right sides together. Sew along the long edge using a 1/4″ seam allowance.

Turn right side out and iron flat, placing the seam in the middle of one side (this will be the inside of the ring). Insert the interfacing strip, positioning the fusible side so it will be attached to the side of the ring which will face the outside (the side without the seam). I attach a safety pin to one end of the interfacing so I can use that to pull the interfacing through the tube we’ve just created.
Repeat this process for all the fabric pieces you’ve cut out, making as many as you’d like to make a chain of your desired length.
Now you’ll want to attach these pieces together to form the rings. You could order them as you’d like and simply sew the ends together, interlocking the rings as you go.

Or, if you want to make a chain where the rings could be opened and reorganized, you may want to use velcro or snaps as the fastener for each ring. I like this idea, as your fabric chain could then be used as a toy for children when it’s not in use as decoration!
Cut a small piece of velcro, about an inch square and sew one side of the velcro to the end of one of your strips. Sew the second piece to the reverse side of the other side of the strip. (I make sure to tuck the unfinished edge up and position it under the velcro to create a clean edge.)


Once you have the velcro sewn to each strip, you can put your chain together any way you’d like!


I’m a big fan of Thanksgiving. I think the Thankgiving meal is one of the best, and in fact, I’ve been trying to eat a combination of those foods as often as possible during the last couple weeks (yesterday’s lunch was a turkey sandwich with cranberry sauce, and then dinner was a pre-Thanksgiving trial run, complete with homemade stuffing and fresh cranberry sauce)
Tomorrow morning I’ll be getting up early to prepare my part of the meal – squash rolls. I’m going to provide the recipe below, because you really should try these, they’re delicious! (not quick, by any means, but certainly worth it!)
I usually bring them in a basket that I line with a dishtowel (so I can cover them and keep them warm!). I decided that I should really use a nicer basket liner, so I made a new one out of two Amy Butler fabrics. It’s really just an oversized napkin, which could be made using my rick rack napkin tutorial. (And when I’m done with it as a basket liner, I think it might make a nice simple table runner!)


I used pink rick rack for the trim, and even experimented with one of the decorative stitches on my machine… (hard to see here, but it’s a cute little leaf pattern)

And now, the recipe:
Squash Rolls – (from the Garden Way Bread Book, by Ellen Foscue Johnson)
1 c. milk
1/2 c. maple syrup or honey
4 T butter
2 t. salt
1 c. cooked squash (fresh or frozen)
1 1/2 T. dry yeast
1/4 c. warm water
1/2 t. sugar or honey
2 eggs
1 t. grated orange peel
6 1/2 c. unbleached white flour, approximately
In saucepan, scald the milk. Add maple syrup, butter, salt and squash, stirring to mix well. Let sit until lukewarm.
In large bowl dissolve the yeast in warm water with the 1/2 t. sugar or honey. When bubbly, add the cooled milk-squash mixture, eggs, orange peal, and 2 1/2 c. of the flour. Beat with electric mixer 2 minutes. Gradually add enough flour to make a dough that pulls away from the sides of the bowl and is stiff enough to knead.
Turn the dough out onto a floured board and knead until smooth and elastic.
Put dough into a buttered bowl, turn to coat all sides or brush the top with melted butter. Cover and let rise until doubled in size.
Punch the dough down, turn out onto a floured board and knead a few times to press out air bubbles. Cut into pieces about the size of eggs, cover and let rest for 10-15 minutes. Form into rolls of whatever shape you’d like. Brush the tops with melted butter and let rise, lightly covered, until not quite double in size.
Preheat oven to 375. Bake 15 minutes, or until lightly brown on top.
Makes about 2 dozen rolls. YUM!
And something else I’m exicted about… new fabric! Amy Butler’s Midwest Modern 2

I just couldn’t resist! There are some great new colors of the previous patterns, as well as a few new designs. Fun fun!
Have a happy Thanksgiving!


Ashley
South Burlington, Vermont

 Greater than/less than
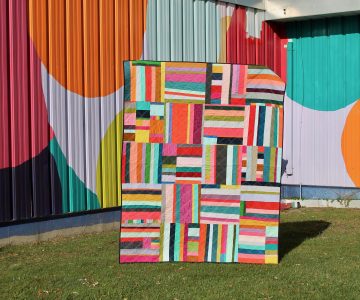 scrappy solids