I’m so blown away by all the wonderful comments on my string quilt, now aptly named ‘Kaleidoscope’ (many thanks to Kerri who was the first to suggest it, followed by 9 others of you who had the same thought!) I think it’s just perfect.
And now, a quick tutorial – I had a few requests for a tutorial on making this type of quilt, so I figured I’d oblige (it’s the least I can do, right?). This shows the paper piecing method, which is my preferred method.
To start, you’ll want to decide on the size of your blocks. For the Kaleidoscope quilt, my blocks were 11″ square. In this tutorial, I’m using 7″ square blocks. I use cheap copy paper, but you could use anything you have on hand – I’ve heard pages from phone books work! – just as long as it’s not a heavyweight paper.
Cut squares of your desired size from the copy paper and set aside.
Decide on your fabrics and cut strips of a variety of widths. I cut strips of 1″ – 2.5″. I like the way it looks with a variety of widths, but you could also cut strips all the same width if you’d prefer. Set these aside.

I wanted to have a small strip of white separate the squares in my quilt, so I cut 1″ strips of a solid white fabric. You could opt for any other solid color – I used green in this baby quilt, or you could use one patterned fabric to tie everything together, or you could skip it completely.
Next we’ll temporarily attach the white strips to the paper squares. With the fabric right side up, lay the strip diagonally on the block. I use a little glue from a glue stick to dab on the back of the fabric strip so it will stick to the paper. You want to make sure that each strip is centered on the diagonal so that your strips will line up with you sew the blocks together. I eyeball mine (’cause I’m lazy!) but you may want to use a ruler and draw a pencil line through the diagonal to help with placement.

Now you can start sewing on your fabric strips! The first strip should be long enough to cover the section of paper right next to the piece glued on the diagonal. You’ll lay your first strip right side down on top of the strip glued to the block.

(please ignore my wrinkly fabric! I’m not much for ironing!)
Align the edges and sew with a 1/4″ seam allowance. Very important: be sure to reduce your stitch length! This will allow you to easily remove the paper from the back later. My machine is typically set at 2.5 – I’ve found that reducing it to 1.5 works well.

Sew along this edge (right through the paper), then iron open with a dry iron. (some may want to skip the ironing, and just finger press – that’s up to you).

Repeat this process, aligning another strip to the strip you just attached, again, right sides together.

Iron open and repeat until you’ve covered the entire paper square. It will look something like this.

Now you can flip the square over so you can see the paper square on the back. Using your clear ruler and rotary cutter, trim the excess fabric, using the paper square as a guide.

And now you’ve completed your first block! I leave the paper on my blocks until I have them all completed.

Repeat for all your paper squares. Then you can arrange them as you like –

When you have your blocks completed, you’ll want to remove the paper from the back. If you’ve reduced the stitch length, the paper should appear almost perferated. I fold the paper along the stitch line and then tear away.
Sew your blocks together and admire your lovely quilt top!
_
_
Like this tutorial and want to make a donation? [paypal-donation]


 Greater than/less than
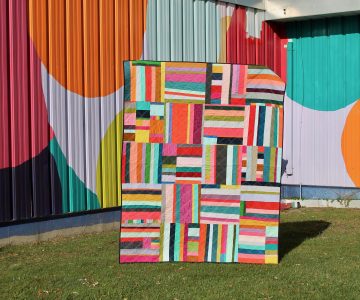 scrappy solids