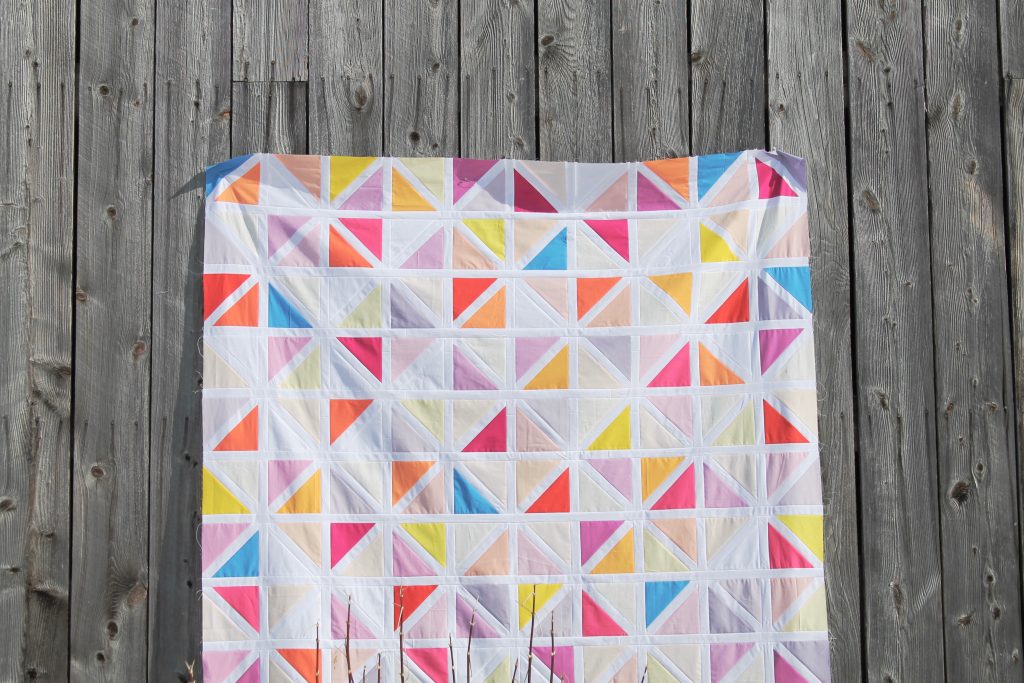
This tutorial should hopefully be quick, as it’s a really simple block (one might wonder why it’s taken so long to write it then!) This block goes together easily and somewhat mindlessly and is a great chance to play around with color. I’ve made two quilts using this block – Ginger Lime Spritz and the one shown below, and I love both equally!
Try it with a different colored sashing (or even a patterned sashing paired with solids), add more or less white space, use printed fabrics for the triangles, sew a scrappy version… so many possibilities!

I’ll show you how to construct the block, then it’s just a matter of making a whole bunch more and sashing them with some skinny sashing.
A few notes:
*All seams are sewn with a 1/4″ seam allowance
*Block size is 6″ unfinished (please note that the block size could easily be adjusted up or down as you’d like!)
*Blocks are foundation pieced (because that’s my preference), but certainly could be made without the paper foundation
*I’m not providing fabric requirements, but to give you an idea, for my 63″ x 75″ quilt I used 1/4 yard cuts of 20 colored solids** plus about 2 1/2 yards of solid white.
[**I used a lot of different solids in this one to get a nice variety of shades, and had a lot left over which I used on the backing. My previous version of this quilt used about 12 different solids.]
Materials needed:
*fabric for sashing
*fabric for triangles (I used 1/4 yard cuts of 20 solids – see note above)
*paper for foundation piecing
*glue stick

For each block, cut a square of paper that measures 6″ square. From each of your fabrics for the triangles cut squares that measure 6 1/4″. Cut each 6 1/4″ square in half diagonally (2 different colored triangles needed for each block). From sashing, cut 1 1/2″ strips and then subcut into 9 1/2″ lengths (1 piece needed for each block). [additional sashing will be required later on once all your blocks are complete – see below for info on those sashing measurements]


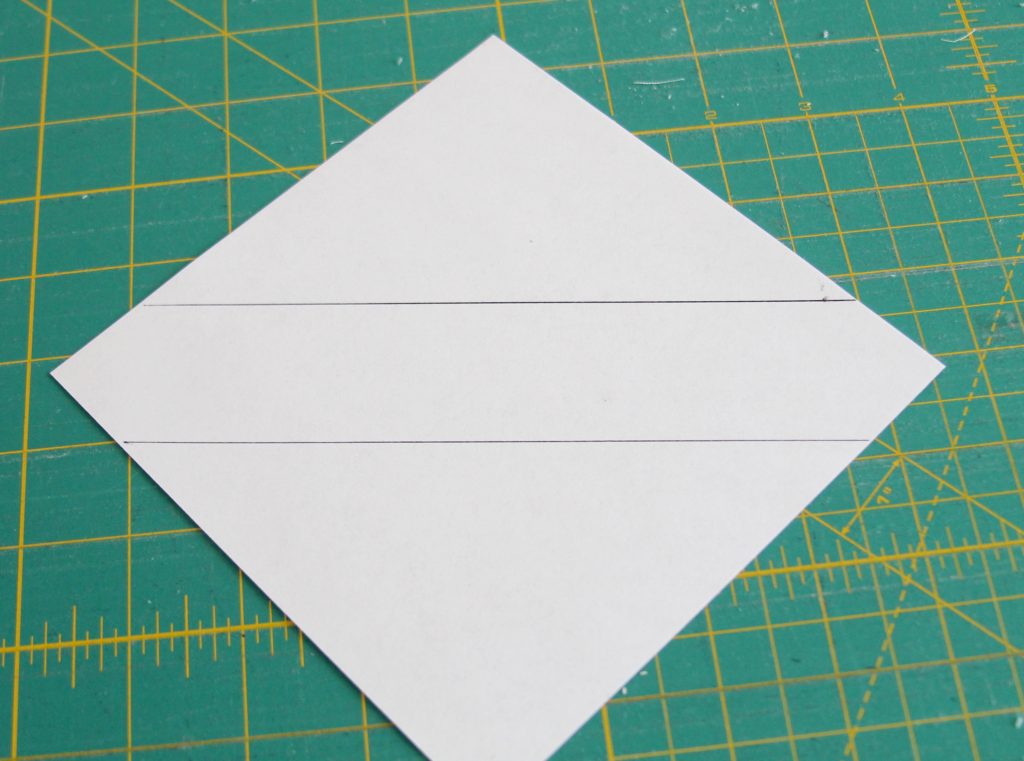
On the paper square, use your ruler to draw a line diagonally through the center. Then move your ruler to either side and mark a line 3/4″ from the diagonal line (or just line up the 3/4″ markings on your ruler along the diagonal center line as I did above and skip drawing the center diagonal line).

Using a glue stick, adhere your sashing piece to the paper aligning the long sides with the markings you made 3/4″ from the center line, right side facing up (this will ensure your sashing is centered).

Take one triangle and line up the long edge (bias edge) with one side of your sashing strip, right sides together. Make sure it’s centered on the paper, so you have approximately the same amount of paper showing on each side. Reduce your stitch length (I adjust mine down from 2.5 to a 1.5), and sew along this edge.
Flip fabric to cover the paper area and finger press (or not, you’ll press the entire block at the end). Repeat for the other side.

Press block, ensuring that fabric covers the paper entirely.

Flip block over so paper faces up, and trim edges, using paper as a guide.

Remove paper pieces by folding along the stitch line and tearing off. The reduced stitch length will allow the paper to be removed easily.

Repeat until you have your desired number of blocks. Once blocks are complete, arrange into your desired layout. Insert a 1 1/2″ x 6″ strip of sashing fabric between each block along the horizontal row.

Once rows are sewn together, determine length and cut strips of sashing that measure 1 1/2″ x your length (you may have to piece these strips to make them long enough). Insert one sashing strip between each row and sew together.
And now, in case you want a simplified version, here’s a quick video Max took (please excuse the quality, he’s new to this!) of me making this block.
I hope you’ll enjoy making this one! Any questions? Let me know and I’ll try to answer! Feel free to tag your work with #twotriangleblock or #twotrianglequilt on IG so I can see it!
_
_
Like this tutorial and want to donate?
[paypal-donation]
 rick rack


9 Responses to Two Triangle – a block tutorial