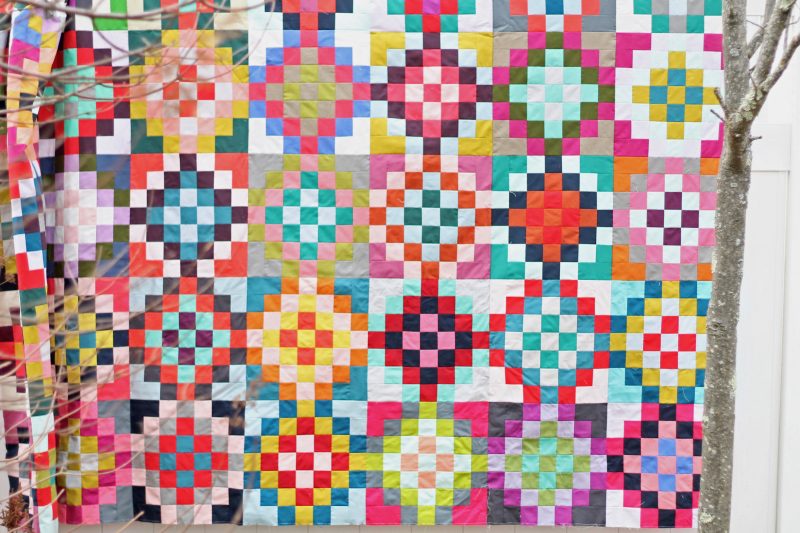
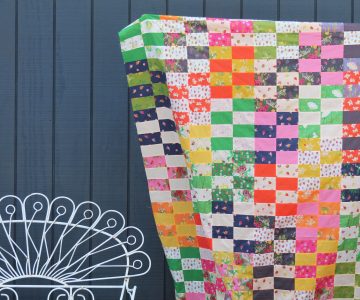
Well, hello! I’m pleased to not only have finished the tutorial for this quilt block (computer problems are still keeping me from doing things as quickly as I’d like… ugh!), but to also finally have a name for this quilt. Thank you to everyone who made suggestions! In my head I’ve been calling it ‘checkered past’, but not in the traditional meaning – more just that it’s checkered and based on a vintage quilt (but who wants to explain that every time?!) so when MaryAnn Macdowell wrote in and suggested “checkerboard garden”, I decided that “Checkered garden” would suit it perfectly. Thanks, MaryAnn!
Anyway, the tutorial! I’m happy to share my method for constructing this block. Appearance-wise it’s a bit scrap vomit, a little scrappy trip around the world, a tilted granny block. I’ve simplified it a bit by limiting it to 5 colors in each block, and by keeping the corners one color. I found it surprisingly satisfying to put together, and I hope you will too! (As a bonus, since there are a few components to the block, you can work on one component for several blocks and really speed up the process!)
I, for one, am not thrilled with the idea of sewing together 49 tiny squares, so I took every opportunity to strip piece sections where I could. Hopefully you’ll find it less tedious than sewing itty bitty squares together! This block is made up of a square in square block, several strip sets, and a 9 patch block. Once they’re all cut and sewn together, they create this colorful block. I’ve tried making this block starting from the inner 9 patch block and working my way out, and also from the outer corners working my way in. I prefer the latter, and will provide instructions for this method in this tutorial.
A few notes:
*14 1/2″ block
*1/4″ seams throughout
*each block uses 5 fabrics – I made mine in Kona solids, but prints would also be fun, just make sure there’s some contrast between neighboring fabrics!
*since the entire block uses 2 1/2″ strips, I precut all my fabrics into 2 1/2″ strips from yardage or fat quarters and then it was easy to simply select the colors I wanted for each block.
*I prefer to cut my strips a bit longer than necessary and then trim to size once sewn, so please note that the fabric requirements below show the exact measurement needed for the length, but I do recommend adding about 1/2″-1″ to the length (length measurement shown first for all the measurements shown below) of those measurements.
for each 14 1/2″ block:
color A: 2 – at least 5″ x 2 1/2″ pieces
2 – at least 9″ x 2 1/2″ pieces
color B: 5″square
2 – at least 10″ x 2 1/2″ strips
color C: 3 – at least 10″ x 2 1/2″ strips
color D: 1 – at least 10″ x 2 1/2″ strips
2 – at least 5″ x 2 1/2″ pieces
1 – at least 2 1/2″ x 2 1/2″ piece
color E: 1 – at least 5″ x 2 1/2″ strip
2 – at least 2 1/2″ x 2 1/2″ piece
Updated to add: I’m providing pressing instructions for nesting seams thanks to a kind reader (clothbowerinsta on IG, thank you!). I typically just press everything open, so I appreciate the help with the nesting seams.
Block A/B: press towards A
Block B/C/B: press to B
Block C/D/C: press to D
Block D/E/D: press to D
Block E/D/E: press to D
Ready? Let’s sew!
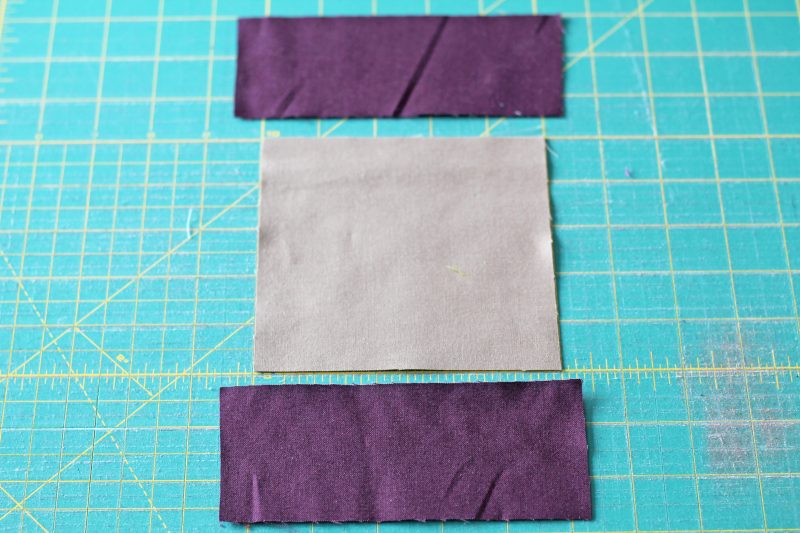
To start, take the 5″ square of color B (Kona cobblestone, in this example) and sew the two 5″ x 2 1/2″ pieces of color A (Kona Raisin) to opposite sides of the square.
Iron and trim sides if necessary. Sew the two 9″ x 2 1/2″ strips of color A to the remaining sides of the square.

Iron and trim to a 9″ square.
Cut this block in half and then in half again to make the 4 corners of the block (each piece is 4 1/2″ square)
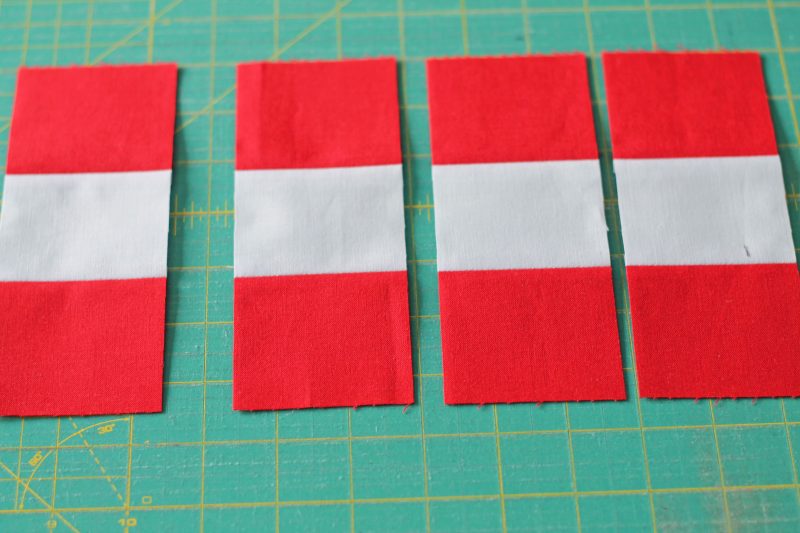
Take the 2 – 10″ x 2 1/2″ strips of color B (Kona cobblestone) along with 1 – 10″ x 2 1/2″ strip of color C (Kona poppy) and alternate strips B, C, B. Sew together these strips in this order along the long side.
Iron and then trim into 4 – 2 1/2″ sections (each piece will measure 2 1/2″ x 6 1/2″)
 (it’s hard to tell here, but the middle color is a pale purple, not the tan used above – sorry for the confusion!)
Take the 2 – 10″ x 2 1/2″ strips of color C (Kona poppy) along with 1 – 10″ x 2 1/2″ strip of color D (Kona orchid) and alternate strips C, D, C. Sew together these strips in this order along the long side.
Iron and then trim into 4 – 2 1/2″ sections (again, each piece will be 2 1/2″ x 6 1/2″)
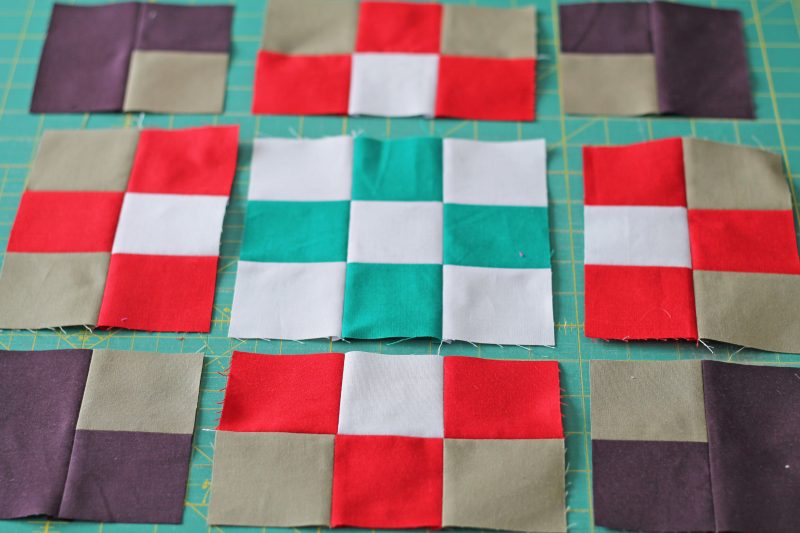
Take the 2 – 5″ x 2 1/2″ pieces of color D (Kona orchid) and the 1 – 5″ x 2 1/2″ piece of color E (Kona emerald) and alternate pieces D, E, D. Sew together these pieces in this order along the long side. Iron and then trim into 2 – 2 1/2″ x 6 1/2″ sections (left side of photo above)
Lastly take the 2 – 2 1/2″ x 2 1/2″ pieces of color E and the 1 – 2 1/2″ x 2 1/2″ piece of color D and alternate pieces E, D, E. Sew together these pieces in this order (right side of photo above). Iron and then trim into 1 – 2 1/2″ x 6 1/2″ section.
Sew together the three sections of colors D & E to make a 9 patch block.
Sew together the strip sections you prepared earlier. Sew section with color B, C, B to section with color C, D, C, as shown above (you’ll end up with 4 blocks that measure 4 1/2″ x 6 1/2″).
Lay out all the components of the block as so.

Sew sections together in rows and iron.
Sew these three sections together to complete your Checkered Garden block. Admire your pretty block and then have fun making a bunch more!
_ _ _
After making a bunch of these, I found that I liked making them in batches of 5-7 at a time, starting by making all the square-in-square blocks first and cutting them into quarters. I liked to keep my quarters stacked together and then I auditioned additional colors as I went.
Once I selected the 5″ square (color B), pink in the photo above, I automatically pulled and cut 2 strips that were at least 10″ long, knowing those would be used in the next round. I liked to fold mine as shown above and place it next to the quartered square to help select color C (green in the photo above). Once I selected color C, I cut 3 strips at least 10″ long and set 2 aside for the following round. [I liked to set my strips aside in advance so I didn’t inadvertently use up all of that color when sewing batches of blocks. Ask me how I know!]
Once I completed strip B, C, B, I kept those stacked and auditioned color D the same way (and so on!). I’m sure you’ll come up with your own techniques that work for you if you make lots of these blocks, and especially if you decide to sew them in batches!
As always, please do let me know if anything’s unclear or if you spot an error. Hope to see lots of checkered garden quilt blocks! Be sure to use #checkeredgarden on IG so I can find them!








 Maze + Vale stripe maze
 Sleeping Porch 2 x 4 quilt


Pingback: Tutorial: ‘Checkered Garden’ quilt block – Quilting
Pingback: Link Love: The Couch Potato Edition - GnomeAngel
Pingback: FITF: a less colorful checkered garden? | Film in the Fridge
Pingback: How to decide how to size a pantograph - Ma Tante Quilting